A few people have asked me how to created the faded picture look that I used in my photo-guestbook.
All you need to do is change the 'lightness' of the pictures that you are using. This can be done with almost any photo-editing software. I used Photoshop myself (I've used it for all of my wedding related designs and I'm no addicted). If you don't have Photoshop, but are interested, you can get a free 30-day trial here.
Here's how I created my faded pictures in photoshop:
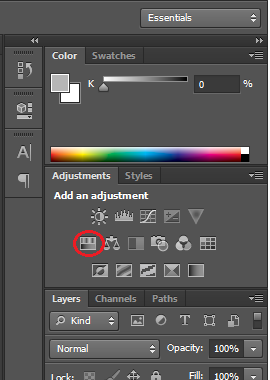
1) After opening your picture in Photoshop, click on the Hue/Saturation icon in Photoshop. This is located on the right side of the screen.
Here is a picture of what the full screen will look like. You can see the Hue/Saturation icon circled.

And here is a close-up of what that icon looks like.
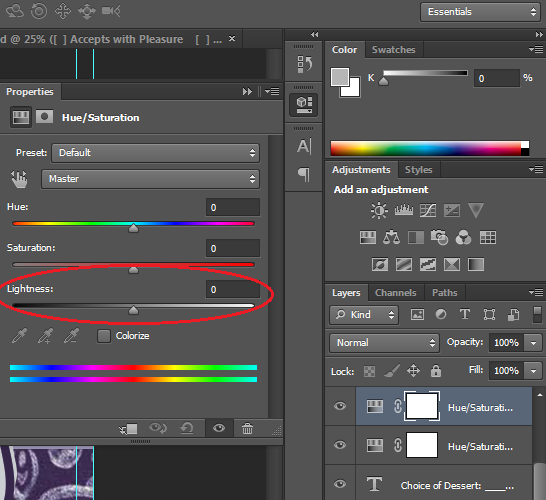
2) Clicking on the Hue/Saturation icon will open a box with several sliding bars that you can adjust. You want to adjust the lightness of the picture. You can do this by sliding the arrow or by changing the number in the box.
I found that a 'lightness' of +75 was perfect for my photobook - at this level you could still see the image, yet it is light enough for guests to write on.

That's it! Only 2 steps.
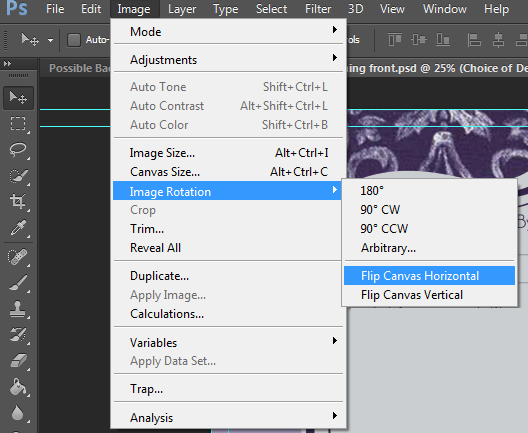
**We also decided to flip the image to created a mirrored look. To do that just click on Image > Image Rotation > Flip Canvas Horizontally
No comments:
Post a Comment